Categories
Misc.

Four Ways To Prolong The Life Of Your Carpet

Vacuum

Making a carpet last longer would help if it was vacuumed. Dust, sand, fibers, gravel, clay and dirt are easily removed using this method. Those dry soils make carpets dirty and weaken the carpet fibers which shorten the life of it. Develop a routine to vacuum your carpet and remove up to 95 percent of all dry soil in carpets–every time. It also keeps those same particles from blending in with the indoor air. Not vacuuming results in the dirt being piled up with new dirt on top of it and that dirt gets new dirt and so on. In other words the dirt becomes hard to remove. Be sure to empty the bag/canister of the vacuum cleaner, clean the brushes and use vinegar to clean the cleaner.
carpet-cleaning-tipsClean

Clean the carpet with dry or liquid carpet cleaner. The carpet cleaner will remove dirt, stains and other grime along with preserving the appearance. Clean spots, clean the surface/appearance and let a professional perform restorative cleaning. The best technique to clean a carpet stain is to apply the cleaner and let it set. The stain will lift from the carpet fibers for easy removal. Be sure to use a white cloth to blot stains. Start on the outside and work inside. To remove the stains vacuum cleaners can’t get clean the whole carpet with carpet cleaner and let it sit before removal. Restorative cleaning is about hiring a CRI service provider to handle the job. All must be done for carpet preservation.
Shoes

The shoes we wear outside can wear down the carpets on the inside. The dirt on shoes grind into carpet every time it’s stepped on. It takes a toll on it, so the best thing to do is to take off your shoes and wear slippers or in-house shoes. Take them off outside before entering or enter and change shoes then. Another way is to place a mat at or near the door. The shoes can stay there while you walk in barefoot or in your socks around the home. In the office use one mat to wipe off dirt from shoes before walking around the rest of the office area.
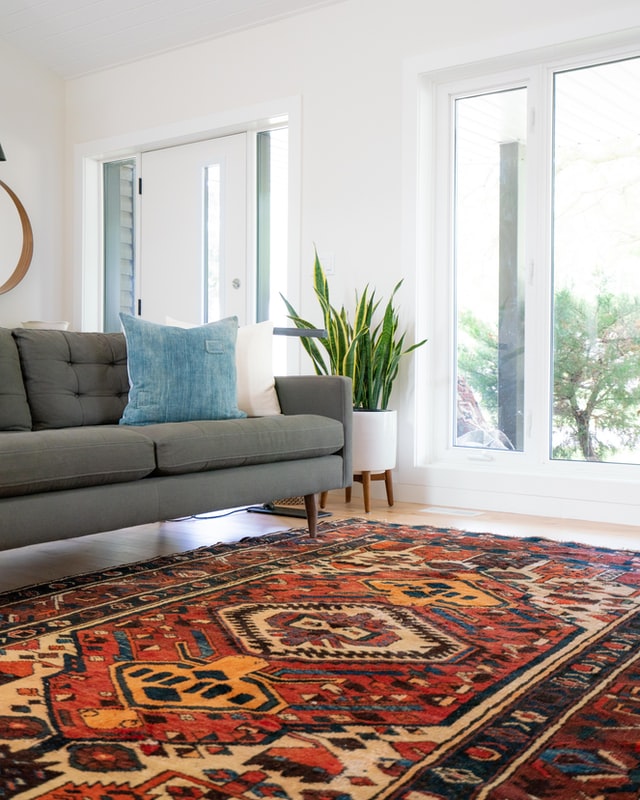
Rearrange

Moving the carpet to a different area of the office is a simple and effective way to preserve the carpet. Keeping it in the same area will make the same kinds of track marks. Those track marks will wear down the sections of the carpet that are walked on. Moving it to a different area of the room or another room entirely will redirect floor traffic. It will save the walked on areas and let other parts of the carpet take the heavy floor traffic.

Categories
Misc.

How To Remove Wallpaper in Six Easy Steps

Perhaps you need to take some wallpaper off a wall so that you can either paint the wall or replace the wallpaper with some other wall covering. Removing wallpaper can sometimes seem a bit challenging. The following six steps will give you an idea of how to take wallpaper off a wall quickly and with relative ease:
Room Preparation:

Getting the room ready is very important since this can be a fairly messy job and you also need to make sure that the wall is clear of certain kinds of obstructions. It is recommended that you put canvas or plastic drop cloths at the base of the walls so that paper and flakes of paint do not get scattered all over the floor. You will also need to make sure that you take all of the switch and socket plates off the wall. In view of the latter you should probably also go down to the basement breaker box and switch off power to the room, using extension cords and lights from other rooms or work lights if you need extra illumination.
wallpaperremovingScore the Wallpaper:

You will be taking the paper off with a wallpaper adhesive remover solution, so you need to cut small holes in the paper in order to allow this solution to take the underlying adhesive off the wall. This can be done with specialized wallpaper scorers which leave a series of tiny holes in the paper as the user runs it across the wall.
Prepare the Solution:

You can elect to use either a commercial wallpaper stripper or create a solution yourself. Water mixed with fabric softener often works as well as any store bought wallpaper stripper. The mix ratio here is one part water to one part fabric softener. Once you have mixed the solution you may want to put it in a spray bottle so that you can cover the scored wall with it evenly and completely. Use hot water and try not to allow it to cool too much before spraying it on the walls.
Apply Solution to Walls:

You should spray the wallpaper remover solution on the walls in sections that you feel you can strip in no more than 15 minutes. As noted above, the water should stay as hot possible so you might want to prepare relatively small amounts of solution at a time. After spraying, let the solution penetrate into the paper for several minutes before beginning to take the wallpaper off.
Strip off the Wallpaper:

Using a putty knife if necessary to get things started or work difficult spots, peel off the wallpaper in the largest strips possible. Try to begin at the bottom corners of wallpaper sections. Peel the wallpaper upwards if possible. Remove as much wallpaper as you can.
Wall Cleaning:

After you have peeled as much wallpaper as possible off the walls, wash the wall down to get the last bits of wallpaper and adhesive that remain. You can put roughly a teaspoon of dish detergent in some hot water and this will work well as a cleanser. Again it is important that the water be as hot as possible. Wipe and scrub the walls with this solution until the last pieces of wallpaper are off and the wall is free of adhesive. Finally, rinse the walls with fresh water.

If you follow thes steps your wallpaper removal job will be go smoothly and be fairly easy.

Categories
Misc.

Ten Things You Need To Know Before Doing Some Interior Painting

Painting the inside of your house is one of the easiest home improvement projects and can be one of the most fulfilling, changing the feel of the house drastically and making the new rooms reflects its purpose and its occupants. If you’re looking to do some interior painting, there are a few things you need to consider. Here are 10 things you’ll need to know before tackling this project.

add-some-interior-color-paintingKnow what type of finish you want. High-gloss paint doesn’t do much to hide wall imperfections, but it’s durable and easy to maintain. Flat paint covers up wall flaws but is harder to clean.
Consider if you want an accent wall. Painting one wall a separate but complementary color from the other three is a common technique to shake things up a little and keep the primary color from being overwhelming.
Figure out how much paint you need. Typically, a gallon of paint will cover 350 square feet. However, are you painting over unpainted drywall or darkly painted walls? If so, plan on painting two coats.
Know how to keep yourself safe. Short-term exposure to paint fumes can cause eye irritation, lung irritation, and headaches. Look for paint with low- or zero-VOC to avoid the toxic chemicals released in those fumes.
Get the right tools. For a typical room painting job, you’ll need painter’s tape, a drop cloth, sandpaper, a sash brush (for painting corners), a sash brush, a paint tray, and a paint roller with an extension pole and roller cover.
You can usually get small samples of colors. It’s hard to visualize what a color will look like on your wall. To avoid the cost of an entire gallon of paint, ask the manufacturer if you can get a sample can to help make up your mind.
Know where to get your paint. Avoid the cheaper stores, as cheap paint will often feel slightly sticky long after it has dried. Go to a home improvement store to check out their selection.
Plan what happens to the furniture. Are you going to cover everything with drop cloths or move everything out of the room and then back in when you’re done? Both require a little planning, so make sure you’ve decided.
Texturing can make a huge difference. You don’t have to be an artist to texture your walls. Achieve texturing effects with a specialty roller cover, such as the floppy roller, a bag roller, or a rag roller.
You may have to prep the walls before you start. If your wall has imperfections, it’s going to be harder to paint. Make the wall as flat as possible before you start.

Got all these things figured out? Then grab your tools, get to work, and transform your house by giving it the look you’ve always wanted!

Categories
Misc.

Nine Secrets To Create Unique And Stylish Headboards

Are you looking to create a unique and stylish headboard for your bed? If so, then you need to think outside the box and try different things. What most people don’t realize is that creating a unique and stylish headboard is not that difficult and doesn’t need to cost you hundreds of dollars.
SECRET #1:

The first secret to creating a unique and stylish headboard is to use some type of fabric. A lot of people like leather and suede, however, you can choose any fabric that you want. My only advice is to choose something that can easily be cleaned.
SECRET #2:

The second secret to creating a unique and stylish headboard is to stain it with a very luxurious stain. A lot of people like this look because they can get it to match the rest of their furniture.
headboard-bedroomSECRET #3:

The third secret to creating unique and stylish headboards is to just decorate the wall. For example, many designers will add a frame to the wall and then place some type of painting or fabric inside of it. This works great because the frame can be moved and it doesn’t cost a lot either.
SECRET #4:

The forth secret to creating a stylish headboard is to consider using glass. The best part about using glass for the headboard is that you can see thru it and it gives your room a big open feel.
SECRET #5:

The fifth secret to creating a unique headboard is to use padding. I am sure you have seen bedrooms that have lots of pillows in them and a great way to get a similar look without all the loose pillows is to place some type of padding on the wall.
SECRET #6:

The sixth secret to creating a very stylish headboard is to take two smaller headboards and set them side by side. This will even work if you have three of these. Just known that this idea will take some plan in to ensure that it looks right.
SECRET #7:

The seventh secret to creating a stylish headboard is to try placing it at an angle. By this i am talking about twisting the brackets on the bed frame so that the headboard angles away for you. This is great for people that like to watch tv or read while in bed.
SECRET #8:

The eighth secret to creating a unique headboard is to simply paint one to match the color of your bedroom. A lot of people do his as it makes the room flow even easier.
SECRET #9:

The ninth secret is to just add some finishing touches to the headboard that you have. For instance, place flowers or something else that will add a little style to it and see how much better it looks.

As you can see it doesn’t take much to create a unique and stylish headboard, so see what you can do and get after it.

Categories
Misc.

Your Step-by-Step Guide To Creating Wooden Planter Boxes

If you’ve always wanted to make your own Planter Boxes, you’ve come to the right spot!

Making your own Wooden Planter Boxes offers you the opportunity to use up any left over materials you may have lying around (which is great for the environment), and allows you to let loose with a little of your own creativity.

wooden-plantersBefore you begin, you’ll need to make sure you have the necessary materials ready to go:

pen or pencil
saw
drill
tape measure
screws
wooden boards
screen

First, you’ll want to decide what size of box you’ll be making.

Now you can measure, mark, and cut the boards accordingly. You’ll be cutting 2 side pieces and 2 end pieces.

Next, line up the end pieces with the sides and attach each end piece to the side pieces, drilling through the end piece into the side piece. Use more or less screws, depending on the size of your wooden planter box.

Now you’ll measure the inside of the box. Then you’ll cut the last piece of wood to those measurements, so it fits inside the box. This will serve as the bottom of the planter.

Now you are ready to attach the bottom piece of the box, by dropping it inside the box and carefully drilling through each side, joining the side piece to the bottom piece and securing them together with the screws as you go.

Time to drill some drainage holes through the bottom of the piece you have just attached.

Some people like to attach a couple of ‘feet’ to the bottom of the planter as well. You can do this by cutting some smaller strips of wood and attaching them to the bottom of the planter. This helps with the drainage also.

You are now ready to cut the screen to fit the inside of the box – same measurements as you had for the bottom piece. The screen is not necessary, but it does help to maintain the dirt and gravel you’ll be adding for the plants.

Finally, you are ready to either set you wooden planter box where you want it, or attach it to a porch rail. If you decide to attach it to a porch rail, you can screw the box directly to the rail, or you can also attach it with a store bought bracket system.

You have just created your own Wooden Planter Box!

Sit back and enjoy your handiwork, or better yet, get out there and plant away!